출처 : http://blog.outsider.ne.kr/239
Struts 2는 MVC Model 2에 기반한 Web Application Framework(WAF)이다. 국내 SI업계에서는 거의 장악한 Struts의 후속 프레임워크이다. 머 스트럿츠2에 대해서 소개하는 건 아니라서(사실 잘 모르기 때문에 은근슬쩍...) 생략하기로 하고 자세한 내용은 다른 루트를 통해서 검색해 보시길....

Struts2를 사용하려면 기본적인 셋팅을 약간 해야되기 때문에 Eclipse에서 셋팅하는 법을 보자. 일단 프로젝트를 만들자 프로젝트를 만드는 것은 기본적인 자바프로젝트랑 동일하다.
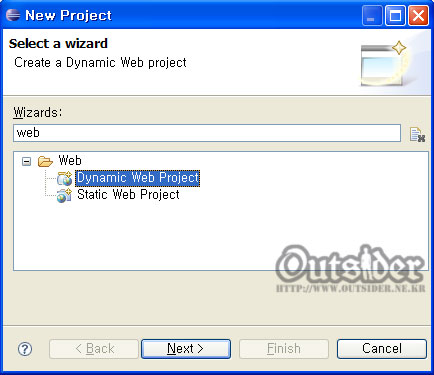
웹어플리케이션이므로 Dynamic Web Project으로 만든다.
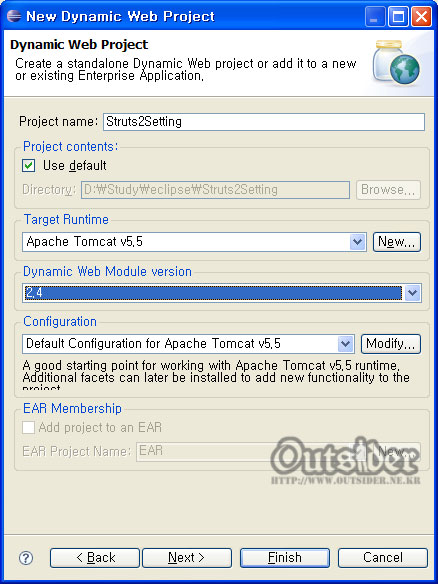
여기서는 Server를 Tomcat 5.5를 사용한다. 이클립스의 톰캣설정에 대한 부분은 여기서는 생략하고 넘어간다. (서버설정이 되어 있다는 전제하에서.....) 프로젝트를 만들었으면 이제 Struts2를 올려야 한다.Struts2는 다운로드 페이지에서 받을 수 있다. 다운로드 받은 파일의 압축을 풀고 안에 lib안에 보면 스트럿츠2에서 필요한 jar들이 들어 있다.
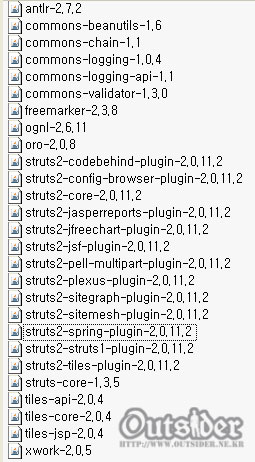
많은 jar파일들이 있는데 스트럿츠2를 구동하는데 이 모든 jar가 다 필요한 것은 아니다. 기본적으로 필요한 파일들은 다음과 같고 나머지는 다른 플러인등을 위한 파일들이다.
- antlr-2.7.2.jar
- commons-beanutils-1.6.jar
- commons-chain-1.1.jar
- commons-logging-1.0.4.jar
- commons-logging-api-1.1.jar
- commons-validator-1.3.0.jar
- freemarker-2.3.8.jar
- ognl-2.6.11.jar
- oro-2.0.8.jar
- struts2-core-2.0.11.2.jar
- struts-core-1.3.5.jar
- xwork-2.0.5.jar
위의 파일들을 WebContent/WEB-INF/lib 에 복사를 한다.
WebContent/WEB-INF/에 있는 web.xml 을 다음과 같이 수정한다.
|
1
2
3
4
5
6
7
8
9
10
11
12
13
14
15
16
17
18
19
20
21
22
23 |
<?xml version="1.0" encoding="UTF-8"?><web-app id="WebApp_ID" version="2.4" xmlns="http://java.sun.com/xml/ns/j2ee" xmlns:xsi="http://www.w3.org/2001/XMLSchema-instance" xsi:schemaLocation="http://java.sun.com/xml/ns/j2ee http://java.sun.com/xml/ns/j2ee/web-app_2_4.xsd"> <display-name> Struts2Setting</display-name> <welcome-file-list> <welcome-file>index.html</welcome-file> <welcome-file>index.htm</welcome-file> <welcome-file>index.jsp</welcome-file> <welcome-file>default.html</welcome-file> <welcome-file>default.htm</welcome-file> <welcome-file>default.jsp</welcome-file> </welcome-file-list> <filter> <filter-name>struts</filter-name> <filter-class>org.apache.struts2.dispatcher.FilterDispatcher</filter-class> </filter> <filter-mapping> <filter-name>struts</filter-name> <url-pattern>/*</url-pattern> </filter-mapping></web-app> |
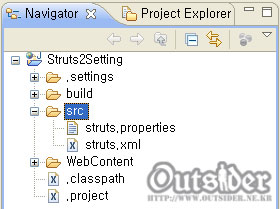
이제 struts.xml과 struts.properties 2개의 파일이 필요하다. 만들어진 웹어플리케이션이 배포될 때의 이 2개의 파일의 위치는 WebContent/WEB-INF/classes/ 이다. 이클립스에 src폴더 아래 있는 것은 자동으로 classes로 배포하기 때문에 src폴더 안에 넣으면 된다. 이클립스의 Project뷰에서는 java파일 말고는 생성되지 않기 때문에 Navigator뷰에서 만들어 넣으면 된다.(이걸 어디다 넣어야 되는지 몰라서 어찌나 고생했는지....)
struts.xml
|
1
2
3
4
5
6
7
8 |
<?xml version="1.0" encoding="UTF-8"?><!DOCTYPE struts PUBLIC "-//Apache Software Foundation//DTD Struts Configuration 2.0//EN" "http://struts.apache.org/dtds/struts-2.0.dtd"><struts> <package name="default" extends="struts-default" namespace=""> </package></struts> |
struts.properties
|
1
2
3
4
5
6
7
8
9
10
11 |
struts.i18n.reload=truestruts.devMode = falsestruts.configuration.xml.reload=truestruts.continuations.package = org.apache.struts2.showcasestruts.custom.i18n.resources=globalMessages#struts.action.extension=jspastruts.url.http.port = 8080#struts.freemarker.manager.classname=customFreemarkerManagerstruts.serve.static=truestruts.serve.static.browserCache=falsestruts.multipart.maxSize=2097252 |
이렇게 하면 스트럿츠2를 구동하기 위한 셋팅은 완료되었다. (아~ 글 길다... ㅡ..ㅡ) 그럼 이제 돌려보자... 셋팅이 잘 되었는지 봐야되니까...
다음과 같은 PrintStringAction.java 파일을 만든다.(팩키지생성같은 설명을 생략한다.) 이 파일이 비즈니스로직을 담당한다.
|
1
2
3
4
5
6
7
8
9
10
11
12
13
14
15 |
package ex.struts;public class PrintStringAction { private String greetings; public String execute() throws Exception { greetings = "Hello World!"; return "success"; } public String getGreetings() { return greetings; } public void setGreetings(String greetings) { this.greetings = greetings; }} |
그리고 WebContent/ 아래에 printString.jsp를 만들어 준다. 이 jsp파일이 뷰단을 담당한다.
|
1
2
3
4
5
6
7
8
9
10
11
12
13
14
15 |
<!DOCTYPE html PUBLIC "-//W3C//DTD XHTML 1.0 Transitional//EN" "http://www.w3.org/TR/xhtml1/DTD/xhtml1-transitional.dtd"><%@ page contentType="text/html; charset=utf-8" %><% request.setCharacterEncoding("utf-8"); %><% response.setContentType("text/html; charset=utf-8"); %><%@ taglib prefix="s" uri="/struts-tags" %> <head> <meta http-equiv="Content-Type" content="text/html; charset=utf-8" /> <title>pringtString</title> </head> <body> <s:property value="greetings" /> </body></html> |
이제 struts.xml파일에 위 2파일에 대한 맵핑을 추가한다.
|
1
2
3
4
5
6
7
8
9
10
11 |
<?xml version="1.0" encoding="UTF-8"?><!DOCTYPE struts PUBLIC "-//Apache Software Foundation//DTD Struts Configuration 2.0//EN" "http://struts.apache.org/dtds/struts-2.0.dtd"><struts> <package name="default" extends="struts-default" namespace=""> <action name="printString" class="ex.struts.PrintStringAction"> <result>/printString.jsp</result> </action> </package></struts> |
이제 프로젝트를 실행하면 된다. Run As. > Run on Server를 실행하고 주소에 printString.action을 실행한다.
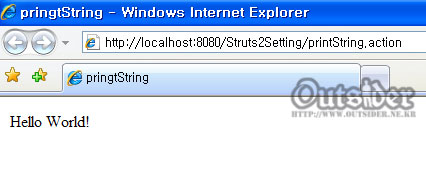
위처럼 Hello World! 가 찍히면 struts 셋팅이 완료된거다.
셋팅에만 집중했기 때문에 다른 부분에 대한 설명은 거의 하지 않았다. 다른것들은 나중에...